How to Repair a Disk
Desmond Leung updated January 6, 2015 at 9:50 AM
There are several ways to repair a HFS+ files system in OS X. It is recommended to repair a disk before Verifying/Repairing Permissions.
If you want to repair a start-up disk (the boot disk that is running the operating system) AND you have your Mac OS X installation/restore disc, follow Method 1.
If you want to repair a start-up disk (the boot disk that is running the operating system) but do not have your Mac OS X installation/restore disk, follow Method 2 or Method 3.
If you want to repair a non-start-up disk (e.g., external drive, etc.), follow Method 4.
Method 1) Use an installation/restore disc to repair a start-up disk
Boot up from your Mac OS X Installation/Restore Disc. You can do this by holding down the C button when your computer boots up after loading the DVD.
- You will be brought to the Language Screen. Click forward to bypass this.
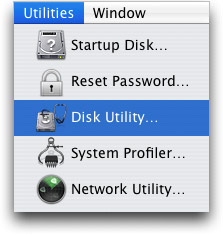
- At the top of the screen, choose Utilities > Disk Utility.
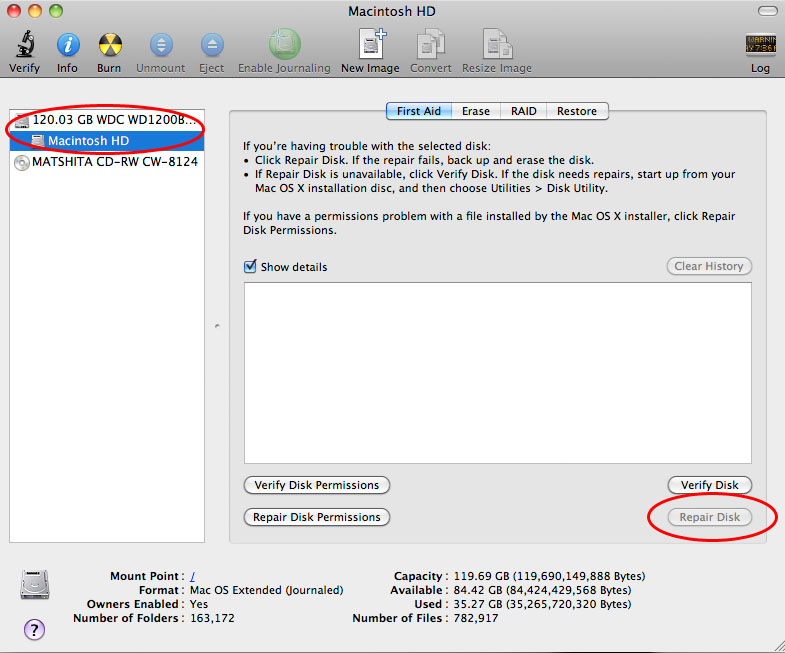
- Choose your hard drive from the left side column. Then choose the First Aid tab and choose Repair Disk.
- If your hard drive is fine, it should say "Hard Drive is OK".
If there are any errors, do another "Repair Disk". If errors still exist, contact the Help Desk
Method 2) Using OS X Recovery to repair a start-up disk
Follow these steps to use OS X Recovery when a Mac OS X Disc or an optical drive is not available:
- Restart your machine and hold down both these keys until the Apple logo appears: ⌘-R ("Command" and "R")
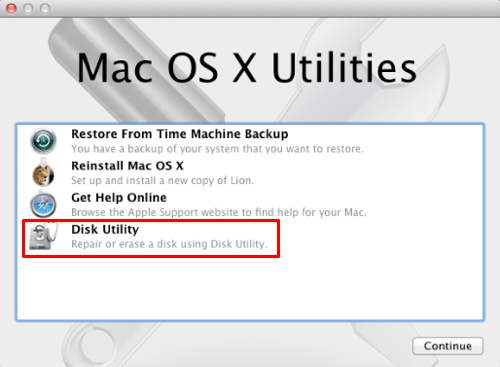
- Once the machine finishes starting up, you should see a desktop with an OS X menu bar and an OS X Utilities window. If you do not, restart the machine and retry the previous step.
- From the Mac OS X Utilities screen, select Disk Utility.
- Choose your hard drive from the left side column. Then choose the First Aid tab and choose Repair Disk.
- If your hard drive is fine, it should say "Hard Drive is OK".
If there are any errors, do another "Repair Disk". If errors still exist, contact the Help Desk.
Method 3) Using Single User Mode to repair a start-up disk
Follow these steps to use Single-User mode when a Mac OS X Disc or an optical drive is not available:
- On a piece of paper, write down the commands
/sbin/fsck -fy
a. exit
- Restart your machine and hold down the ⌘-S ("Command" and "S") key through the startup chime. After ~30 seconds a black screen will appear with scrolling text.
- When the :/ root# prompt appears, type /sbin/fsck -fy. and press return. This command will start a disk repair.

- If no errors were found, the final message will display:
** The volume (name_of_hard_drive) appears to be OK
If the disk was successfully repaired, this message will display:
** The volume (name_of_hard_drive) was repaired successfully.
If there are any errors, do another "Repair Disk". If errors still exist, contact the Help Desk.
- Type "exit" and press return to resume booting to Mac OS X.
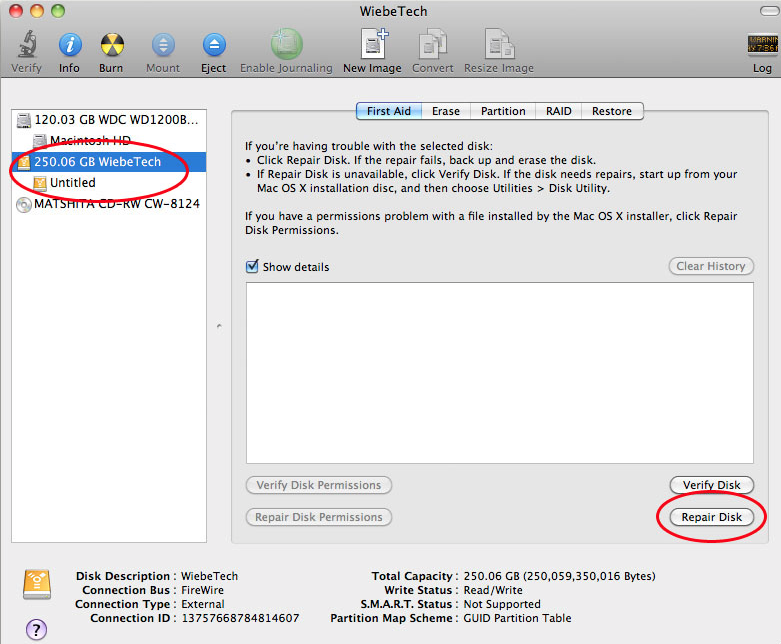
Method 4) Use the installed Disk Utility to repair a non-start up disk only
Follow these steps to repair a non-start-up disk, such as an external hard drive.
- Open Applications > Utilities > Disk Utility.
- Choose the volume that you want to repair.
- Go to First Aid tab.
- Choose Repair Disk.
- If your hard drive is fine, it should say "Hard Drive is OK".
If there are any errors, do another "Repair Disk". If errors still exist, contact the Help Desk.
If you need further assistance, please contact IGPP Help Desk.