/
HelpSpot Basics
HelpSpot Basics
- Former user (Deleted)
Owned by Former user (Deleted)
Dec 15, 2017
Introduction
This wiki explains the basics of navigating the HelpSpot ticketing system.
Note (For users submitting tickets via email):
To respond to an existing ticket, make sure to include the ticket number at the end of the subject line:
Subject: Something Interesting {12345}
If the email does not have such a ticket number in the subject line then Helpspot will make a new ticket automatically.
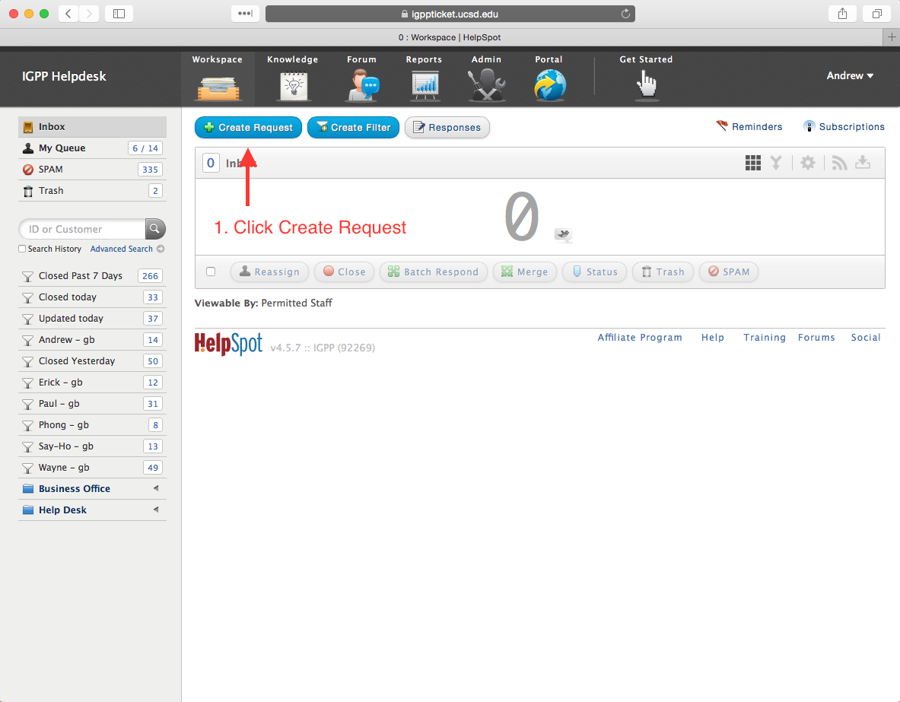
Creating a New Ticket:
- Click Create Request.
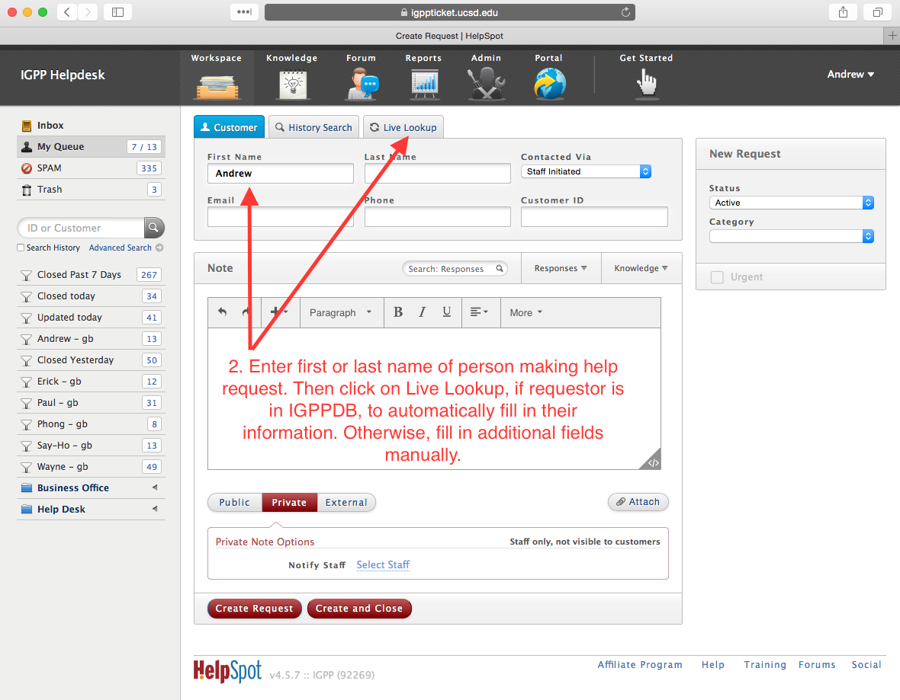
- Under Customer tab, enter first or last name of person making the help request. Click Live Lookup, if requestor is in IGPPDB, to automatically fill in their information. Otherwise, fill in additional fields manually.
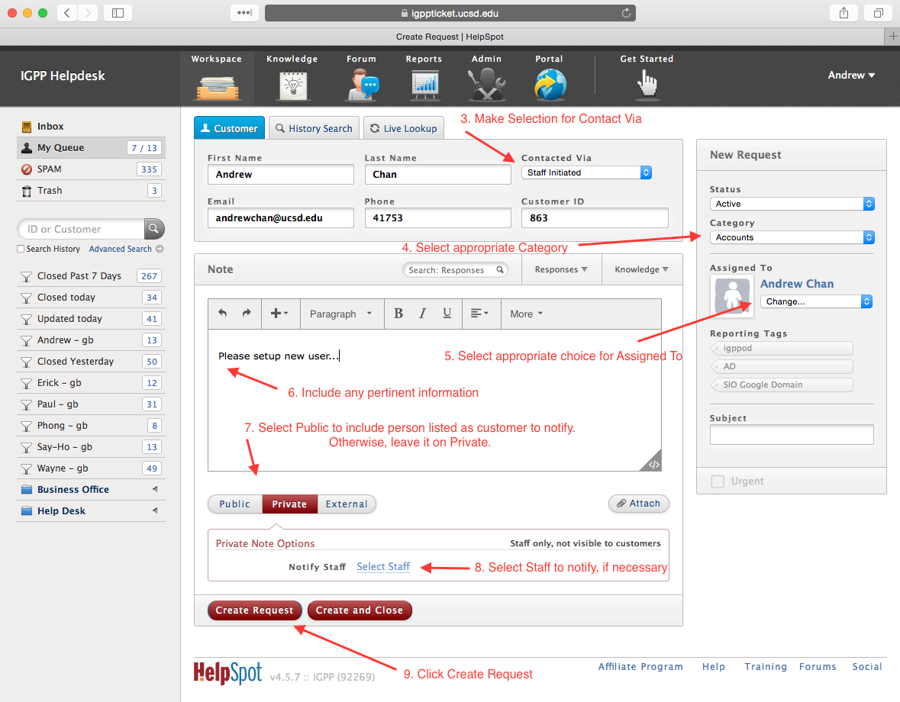
- Contact Via selection to choose how the requestor made initial contact.
- Assign Category (i.e. Business Office, Biz - Academic Hiring).
- Under Assigned To: select person responsible for completing the ticket's work, or INBOX if uncertain of assignment.
- Enter in any pertinent information (i.e. Employee ID number, start date, etc.).
- Public, Private, External selection. Public to notify Customer (person making request) entered above. Private to not notify customer, but could notify internal staff. External if necessary to notify outside users (i.e. outside of IGPP and/or UCSD).
- Select Staff to notify any additional internal staff.
- Click Create Request to submit the ticket.
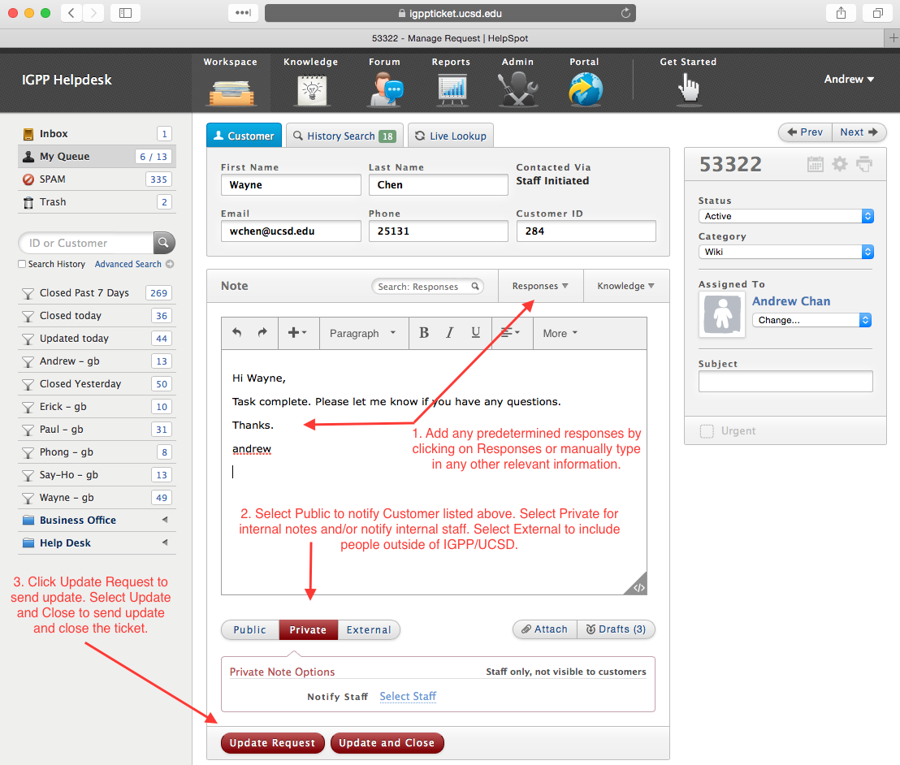
Updating An Existing Ticket:
- Open ticket, add any predetermined response by clicking on Responses or manually type in any other relevant information.
- Select Public to notify Customer listed above. Select Private for internal notes and/or notify internal staff. Select External to include people outside of IGPP/UCSD.
- Click Update Request to send update. Select Update and Close to send update and close the ticket.
, multiple selections available,
Related content
New Employee Procedures for Front Desk
New Employee Procedures for Front Desk
More like this
Contact IGPP Help Desk Network Operations
Contact IGPP Help Desk Network Operations
More like this
Reserving A Conference Room
Reserving A Conference Room
More like this
Self Service
Self Service
More like this
Technical Support The IGPP Helpdesk
Technical Support The IGPP Helpdesk
More like this
Approving Reservations on the IGPP Calendar
Approving Reservations on the IGPP Calendar
More like this